The Carlson BRx6+ GPS requires SurvCE or SurvPC Version 5.09 or higher.
You can click the link below to download a PDF document with screenshots:
Carlson
BRx6+_base-rover UHF.pdf
Here is the instructions for connecting a BRx6+ base and rover using the internal UHF radios:
- Power on your BRx6+ base and then tap Equip / GPS Base and set it for Manufacturer: Carlson and Model: BRx6+
- Tap the "Comms" tab and set it for "Type: Bluetooth" and "BT Type: Windows Mobile" and tap the "wrenches" icon to
the right. Tap "Find Device" and follow the prompts to select the serial number of your BRx6+ base then tap the
Bluetooth plug icon in the top middle
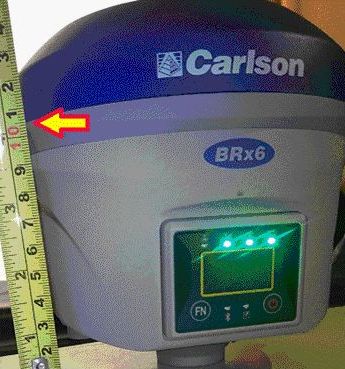
- Then tap the Receiver tab and tap next to "Slant" and measure up to the line where the top Blue cap meets the
bottom Grey housing as shown in the image to the right with the Arrow symbol to use for your Antenna height
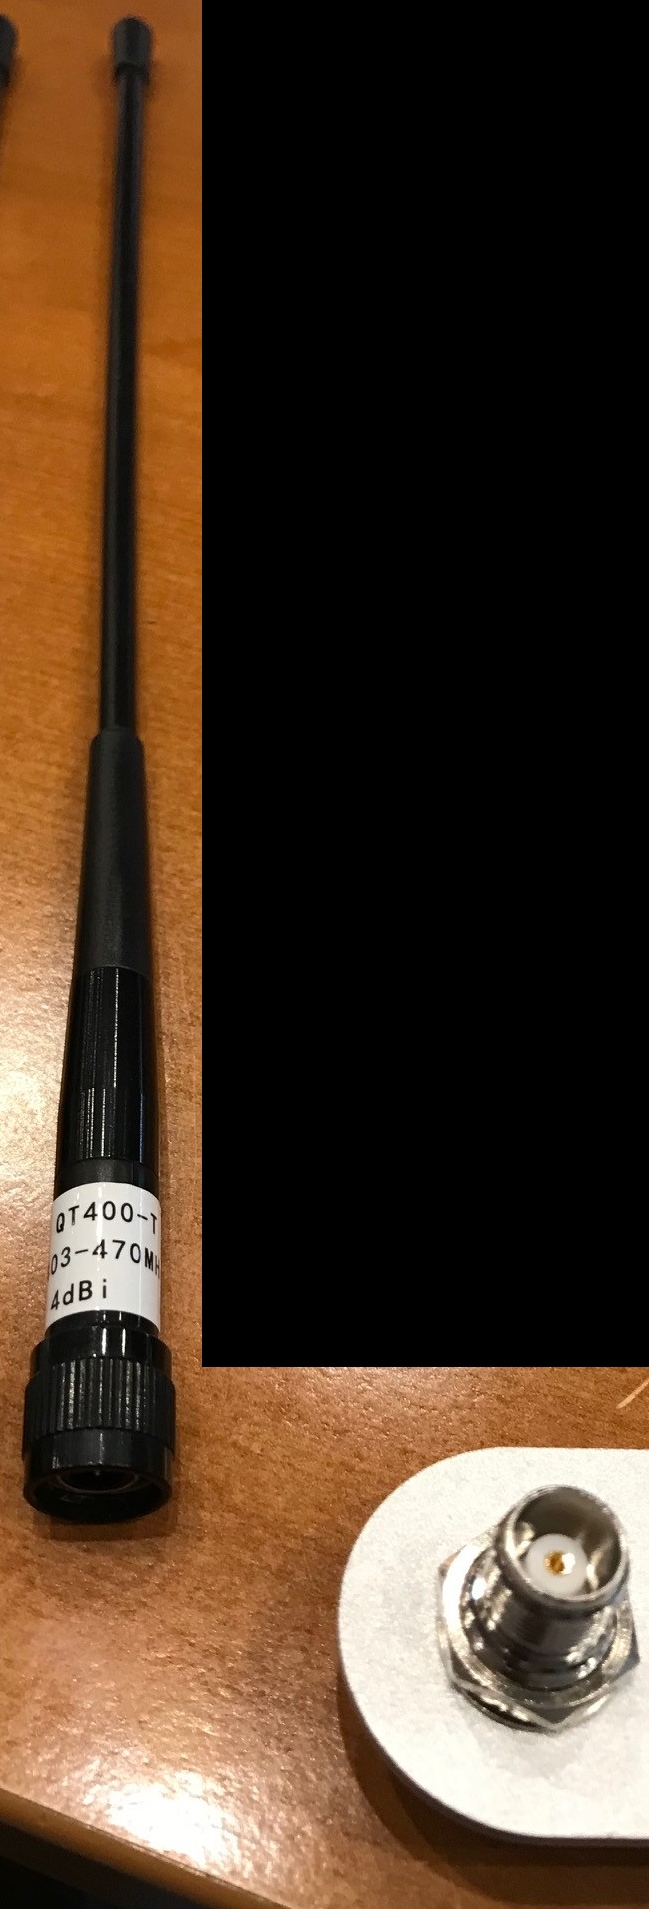
- Attach the silver metal bracket to the bottom of the BRx6+ base and attach the short cable to the UHF port on the
left as you are looking at the front panel of the BRx6+ then connect the QT400-T antenna to the bracket so it points
straight up in the air
- Tap the RTK tab and set it for "Device: Internal UHF" and "Message Type: RTCM V3.2"
- Tap the "wrenches" next to "Device: Internal UHF" and fill out the radio using the settings below then tap the
Green Check:
- Protocol: Satel
- Power: 1 watt
- Channel: 1: 0 Mhz
- New Channel Frequency: 461.0000
- Channel Spacing: 25khz
- Forward Error Correction: On
- Please Note: If you have an FCC licensed frequency or a custom frequency you want to use
you can type this into the "New Channel Frequency" box and it will program Channel #1 to the new frequency.
7. Tap the Green Check and use one of the options in the "From New Position" or the "From Known position" to start the
GPS base
8. Power on the BRx6+ Rover and make sure the UHF antenna is screwed in to the left side (the port labeled UHF)
9. Tap Equip / GPS Rover and repeat Step #2 above to connect to the Rover by Bluetooth
10. In the Receiver tab type in the Antenna height of 6.5617 feet set to "Vert" for vertical if you are using the 2
meter pole that comes with it
11. Tap the RTK tab and set it for "Device: Internal UHF" and make sure to check the box next to "Use any Base ID"
12. Tap the "wrenches" next to "Device: Internal UHF" and fill it out using the exact same settings as the ones you used
for the base setup above then tap the Green Check to save your changes
- Protocol: Satel
- Power: 1 watt
- Channel: 1: 0 Mhz
- New Channel Frequency: 461.0000
- Channel Spacing: 25khz
- Forward Error Correction: On
***If you used a custom frequency for the base other than 461.0000 you will need to type in the same exact frequency you
used for your Base Radio in the "New Channel Frequency" box below "1: 0MHz" to make sure your Rover radio is properly
matched with the base radio
13. Now you can tap the Green Check to initialize the Rover and go into Equip / Monitor Skyplot and check to see if you
are getting a FIXED solution